Plant More Natives
  • Plant Store
  • Merchandise
  • Gift Cards
  • Join/Connect
  • About
  • Plant Store
  • Merchandise
  • Gift Cards
  • Join/Connect
  • About
Search

It's Plantin' Time

12/14/2015

Comments

 
So, you’ve pulled on a sweatshirt, solicited some help, and you’re ready to plant. The buckets have been set, tweaked, and you’re finally satisfied with the layout. It’s time to get started, so you’re off and running like a herd of turtles. Quite literally, the installation could take that long and not because you’re following strict planting instructions, but because you can really take your time. No rush. If you can’t get it all done in one afternoon, one day, or one weekend, not a big deal. Just watch the soil moisture in the remaining buckets.
Picture
Start by moving a bucket to the side and removing just enough soil from the hole to get the rootball in the ground. The top of the rootball should be slightly above grade. This will ensure the roots can breathe, since they need oxygen to develop a healthy structure. If the soil is too dense or sandy, mix in some compost to improve the structure. Rough up the roots a bit, set the plant in the hole, backfill, and finally, firm the soil with your foot. Although plant roots need a good flow of oxygen through tiny air pockets, they also need good contact with the soil to draw up water and nutrients, especially during transition. On to the next bucket…
PictureHydrangea quercifolia 'Snow Queen'
You’ve finished planting and are ready to mulch. Again, I use tree chips from my tree service guys. However, you may prefer to use shredded mulch from a local distributer. Mulch heavily (2-3”) around your new plants, but do not mulch against the main stem(s) or trunk. Mulch can be applied at any time of year, but subsequent applications are easiest to spread when herbaceous and deciduous plants go dormant. If you’ve planned and planted your beds as I’ve suggested with plants touching at maturity, eventually, you will leave a thin layer of leaves in the middle of the beds and mulch only along the outer edge. For right now and a few years to come, mulching may be a time-consuming activity. But over time, not so much. Keep in mind... Year 1: plants sleep; Year 2: plants creep; Year 3: they leap.

Some additional tips regarding initial irrigation, pruning and fertilization:

  • Do not allow soil to become powder dry or a muddy mess between waterings. Root systems will take one to two years to fully establish and become drought tolerant. Once established, plants should be watered deeply only two to three times per week during periods of drought or dry weather. This practice will encourage roots to go deeper into the soil in search of water as the soil surface begins to dry out.

  • Understand how well your soil retains moisture by digging down six inches in the shrub beds on a regular basis. Adjust irrigation programming accordingly.

  • Add a rain sensor to your irrigation system to prevent it from running during periods of adequate rainfall.

  • Avoid pruning and fertilizing newly installed plants for two years. These activities cause stress by encouraging new top growth before roots are fully established.

  • When pruning is necessary to thin and shorten, make cuts 1/4” above lateral (side) branch. Prune non-flowering plants during dormancy (Dec-Mar).  Prune flowering plants after they bloom. Prune woody perennials, such as Artemesia, Verbena, and Lavander, early spring after new growth appears. Remove up to one-third of any plant at any one time.

  • Allow plants to knit together as they mature. This reduces the amount of water and mulch required to keep plants healthy and beds weed-free.

Happy Holidays!
Picture
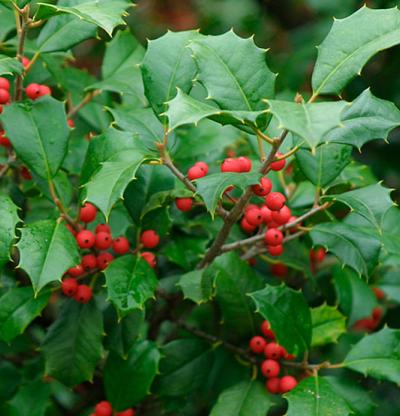
Ilex opaca (American Holly)
Comments
    Picture
    Karen
    Welcome to my journal. For over 20 years I've created original landscape plans to help homeowners increase property value and really enjoy their yards. I approach every project as an unique opportunity to develop a work of living art, one that will require minimal care and age beautifully with time. In this journal, I will share some of my field experiences and tricks of the trade with you. Feel free to email questions. Thanks for visiting.

    Archives

    February 2019
    January 2018
    September 2017
    January 2017
    September 2016
    July 2016
    May 2016
    April 2016
    March 2016
    February 2016
    January 2016
    December 2015
    November 2015
    October 2015
    September 2015
    August 2015
    July 2015
    June 2015
    May 2015
    April 2015
    March 2015
    February 2015

Follow Us

Copyright © 2023 Plant More Natives, LLC, Richmond, Virginia. All rights reserved.

Customer Care

Contact Us
Order and Shipping  Information

​Go-To Native Plant List
Eastern US Butterflies & Host Plants

Nectar Sources for Beneficial Bugs
Food Sources for Mason Bees

Go-To Green Mulch
Natives for Containers
Bloom Height Chart
Botanical Name Cheat Sheet


Picture
Picture
  • Plant Store
  • Merchandise
  • Gift Cards
  • Join/Connect
  • About